Installing the Virtuemart Calendar Date tool is very quick and easy; and installs as a regular Joomla plugin. Step by step instructions, including how to use the plugin and create custom fields in Virtuemart.
Installing the Virtuemart Calendar Date tool is very quick and easy; and installs as a regular Joomla plugin.
1. Installs as a standard Joomla plugin
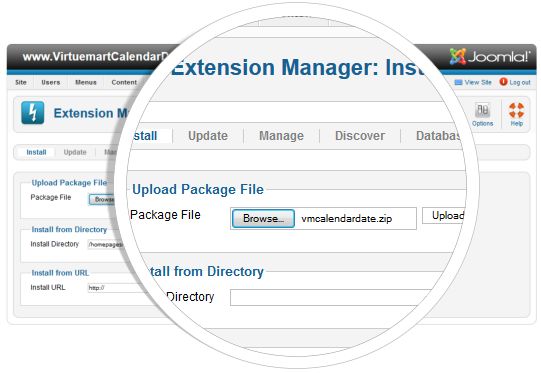
Navigate to Joomla’s extension manager and select the zip file “vmcalendardate.zip” from your hard drive and install.
2. Enable the plugin
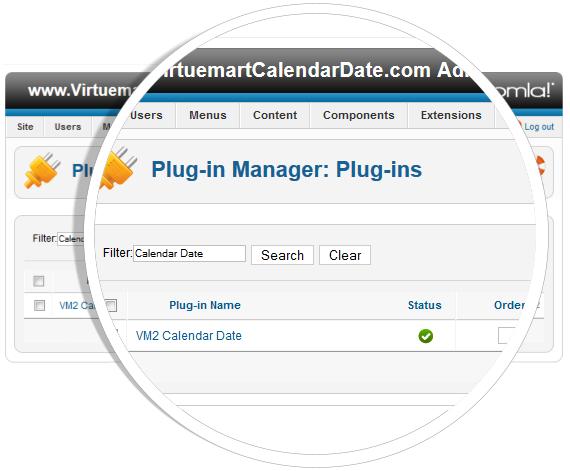
Go to Joomla plugins and make sure the “VM2 Calendar Date” plugin has been enabled. You can type in “Calendar Date” to filter the list of available plugins.
3. Select the Custom Fields link in VirtueMart

Navigate to the main control panel for Virtuemart and select “Custom Fields”. Then select the icon to create a new custom field.
4. Select the Virtuemart plug-ins as a custom field
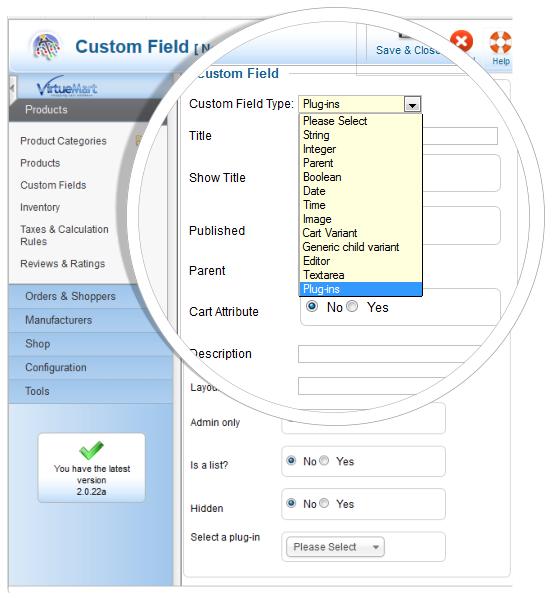
Open the dropdown table in the “Custom Field Type” and choose the “Plug-ins” option. Mark the filed as a “Cart Attribute” as Yes. Then scroll down to the bottom and find “Select a plug-in” and choose the “VM2 Calendar Date” option. Be sure to give your calendar date a title. Select “Save and close” when you are finished configuring .
5. Choose your custom field in Virtuemart’s product listing
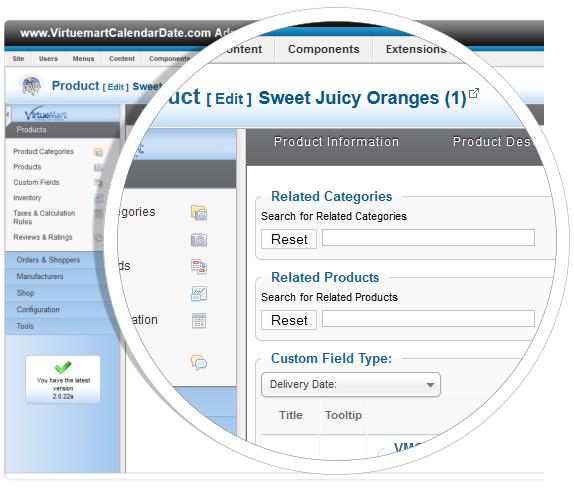
Go to Virtuemart product link and open the product listing you would like to add a custom date filed to. Navigate over to the last tab “Custom field” and select your newly created calendar date field.